DIY Christmas Present Season, Volume 2
My nephew likes to color, and by color, I mean stab the paper and draw random lines. But he's two, so we don't judge. His mommy is 8+ months preggers so it takes a lot of effort to get out all of his coloring items, not to mention that in a few weeks, he won't be the center of attention for a while and needs something to keep himself busy.
I found this tutorial over at Skip to my Lou, and while it's cute (see below), little man doesn't really like flowers. I decided to change the design a little, but having Cindy's framework for the project helped a lot.

(Can one of my friends hurry up and have a little girl so I can make a flowery one?) Wishes aside, I love the way my baseball version turned out.

Since I was changing Cindy's design up a little, I had to sketch mine out. (I'm a visual learner, btw.) I also decided not to use the ribbon/button closure so it wouldn't mess up the visual of the baseball.

Notice the "bite" out of the white felt? I knew I wouldn't need the whole piece for the the baseball, so I used a little for the Pin Cushion Jar.
You will need:
-two pieces of black felt for the inside and outside
-one piece of white felt for the baseball and pocket piece
-one piece of red felt for the top of the pocket piece (or you could use ribbon)
-red embroidery floss for the baseball stitching
-red thread
-black snap closure (it blends in with the black felt)
-3x5 memo pad (red to match)
-8 crayons
First I measured and cut out the felt pieces: black-6"x12", white-3"x12", white for baseball-traced around a bowl I had. There is no red in the first picture because I had actually bought some red ribbon to use but when it came time to make this, I couldn't find the ribbon, so I cut it out later-3/4ish"x12".


Then I sewed on the red piece to the white pocket piece, stitching along the top and bottom edges of the red piece.

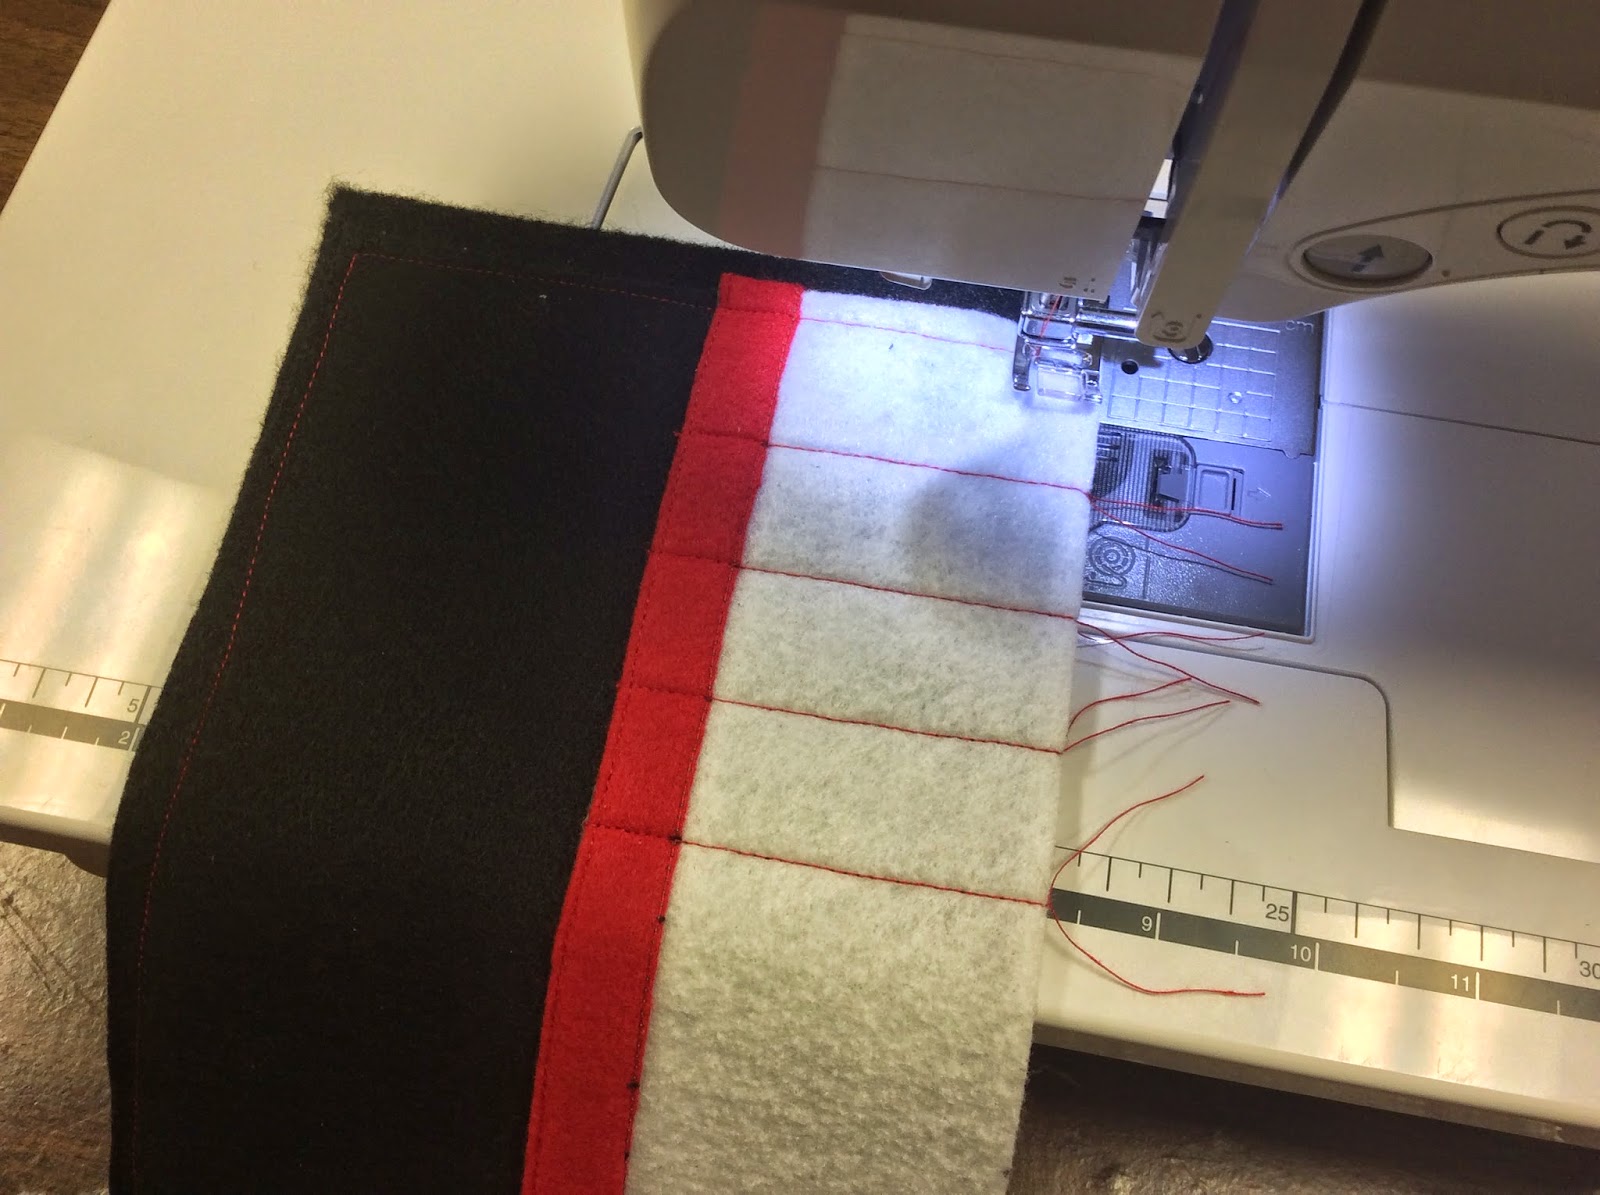
Next I sewed the pocket piece to one of the black pieces. The only stitches I made here is to divide the pockets. I found the middle of the pocket piece and measured 1 5/8" on each side of the middle to create the memo pad pocket, then 1" for each of the crayon pockets. Note: the first and last crayon pockets will be give or take 1 1/2". Start stitching at the top edge of the red piece down the the bottom of the white.

Next I hand-stitched one side of the snap closure to the left side of the pocket/lining piece. To be totally honest, it took me a couple of minutes to figure out where the snaps should go.

I didn't get a picture of the other side of the snap until after I was done because I'm a ding-dong and forgot to even sew it on until I went to close it up for the "after" pics. So please forgive me. If you look real close, the snap is on the right side. If I had remembered to actually put it on when I should have, I would have sewed it to the back piece (that hasn't been worked with up to this point) because the stitching would be a little more hidden and safe.

I also don't have pics of the making of the baseball (bad blogger!) but all I did was draw dots in a crescent-ish shape, puncture them with an x-acto knife, and thread the red floss through. Then I sewed it on to the outside black piece. I considered using white thread for this so it would blend in to the baseball, but blending in is overrated. Also, don't judge mylapse of concentration unique touch. I was actually working on this at school during finals. Some of the high school students who had finished other finals came to the band hall and were watching Monsters University and talking to me. You will also notice some of the baseball is hanging over. I knew I was going to trim the whole thing once it was complete anyway.

Finally, I put both the pocket/lining piece and outside/baseball piece together and sewed all the way around and trimmed the excess felt.
And now the finished product:


There's a few things I would do differently (like using ribbon on the top edge of the pocket instead of more felt, or like not watching Disney movies with high schoolers while sewing, or even like sewing on things in the right order) but overall, I am happy with the result.
The day after I finished this, I found this version on Pinterest. I think I may try it this way next time.
I found this tutorial over at Skip to my Lou, and while it's cute (see below), little man doesn't really like flowers. I decided to change the design a little, but having Cindy's framework for the project helped a lot.
(Can one of my friends hurry up and have a little girl so I can make a flowery one?) Wishes aside, I love the way my baseball version turned out.
Since I was changing Cindy's design up a little, I had to sketch mine out. (I'm a visual learner, btw.) I also decided not to use the ribbon/button closure so it wouldn't mess up the visual of the baseball.
Notice the "bite" out of the white felt? I knew I wouldn't need the whole piece for the the baseball, so I used a little for the Pin Cushion Jar.
You will need:
-two pieces of black felt for the inside and outside
-one piece of white felt for the baseball and pocket piece
-one piece of red felt for the top of the pocket piece (or you could use ribbon)
-red embroidery floss for the baseball stitching
-red thread
-black snap closure (it blends in with the black felt)
-3x5 memo pad (red to match)
-8 crayons
First I measured and cut out the felt pieces: black-6"x12", white-3"x12", white for baseball-traced around a bowl I had. There is no red in the first picture because I had actually bought some red ribbon to use but when it came time to make this, I couldn't find the ribbon, so I cut it out later-3/4ish"x12".
Then I sewed on the red piece to the white pocket piece, stitching along the top and bottom edges of the red piece.
Next I sewed the pocket piece to one of the black pieces. The only stitches I made here is to divide the pockets. I found the middle of the pocket piece and measured 1 5/8" on each side of the middle to create the memo pad pocket, then 1" for each of the crayon pockets. Note: the first and last crayon pockets will be give or take 1 1/2". Start stitching at the top edge of the red piece down the the bottom of the white.
Next I hand-stitched one side of the snap closure to the left side of the pocket/lining piece. To be totally honest, it took me a couple of minutes to figure out where the snaps should go.
I didn't get a picture of the other side of the snap until after I was done because I'm a ding-dong and forgot to even sew it on until I went to close it up for the "after" pics. So please forgive me. If you look real close, the snap is on the right side. If I had remembered to actually put it on when I should have, I would have sewed it to the back piece (that hasn't been worked with up to this point) because the stitching would be a little more hidden and safe.
I also don't have pics of the making of the baseball (bad blogger!) but all I did was draw dots in a crescent-ish shape, puncture them with an x-acto knife, and thread the red floss through. Then I sewed it on to the outside black piece. I considered using white thread for this so it would blend in to the baseball, but blending in is overrated. Also, don't judge my
Finally, I put both the pocket/lining piece and outside/baseball piece together and sewed all the way around and trimmed the excess felt.
And now the finished product:
There's a few things I would do differently (like using ribbon on the top edge of the pocket instead of more felt, or like not watching Disney movies with high schoolers while sewing, or even like sewing on things in the right order) but overall, I am happy with the result.
The day after I finished this, I found this version on Pinterest. I think I may try it this way next time.
 |
| Photo courtesy of Babyology.com.au |
Happy coloring!
No comments:
Post a Comment